Connections
Intro
Connections form a key feature of Cavalry and can be used to set up attributes that drive other attributes.
While Cavalry's UI offers Layer based interactions, Cavalry is actually 'node based' behind the scenes meaning when a connection is made, the data from one Layer's attribute is being directly passed to another's.
Connections can be created by clicking and dragging from a Connection Anchor. A Connection Anchor is anything that turns blue on rollover.

For those coming from After Effects, it’s important to note that making connections in Cavalry is not a shortcut for writing JavaScript expressions – connections are being made between the Layers. The result is speedy computation and versatility.
Creating Connections
To create a connection in the Attribute Editor:
- Hover the cursor over an attribute (the Connection Anchor icon will change to state 2).
- Move the cursor over the Connection Anchor icon (the icon will turn to state 3) then click and drag.
- Move the cursor to another attribute (the ‘connection’ will turn blue when it can connect).
- Release the mouse.

A connection icon will appear on both the attribute the connection was started from and the attribute the connection was dropped onto in step 4 indicating you have made a connection.
When the id is mentioned it refers to the connection available from the header bar of a Layer's Attribute Editor UI. This is the output of a Layer.
The process in the Scene Window is very similar:
- Rollover a Layer (the Connection Anchor icon will change to state 2).
- Move the cursor over the Connection Anchor icon (the icon will turn to state 3) then click and drag.
- Move the cursor to another Layer (the ‘connection’ will turn blue when it can connect).
- Release the mouse.
- A pop up window will appear.
- Select the row (attribute) to connect to.
- Click the mouse.
A connection icon will appear on the layer the connection was dropped onto in step 6 indicating a connection has been made.
The Option/Alt key can be used to create connections to multiple layers at the same time:
- Create 3 Shapes (Shape1, Shape2, Shape3).
- Create a Value Behaviour.
- Load the Value and Shape1 into the Attribute Editor.
- Select all 3 Shapes in the Scene Window.
- With the Option/Alt key held, drag a connection from value.id→shape1.position.x in the Attribute Editor.
A connection from the Value to the position.x attribute of each Shape is made.
Inputs and Outputs
Connections can be inputs or outputs.
- An Input is when an attribute is being driven by another attribute.
- An Output is when an attribute is driving another attribute.
An attribute can have several outputs but can only have one input. An animation curve (keyframes) is considered an input so overwriting the connection with another input will replace the animation curve meaning any keyframe data will be lost.
Inputs are indicated by a yellow left facing icon. Outputs are indicated by a right facing purple icon.

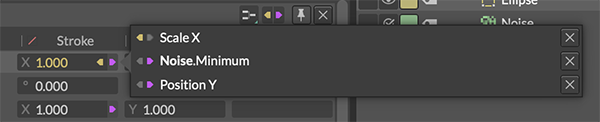
Clicking on a connection icon will open a pop over showing you a list of existing connections. Double click on the row to reveal the connected layer/attribute or click the cross to break the connection.
When inside a popover, holding Cmd/Ctrl when either double clicking on a connection, or clicking the 'x' to disconnect the attribute, the window will stay open, allowing several operations at once.
To overwrite an existing connection hold down Cmd/Ctrl when using the Connector or select Replace Connection in the contextual menu.
Data Types
Connections can be made between attributes with compatible data types. For example, a string (text) cannot be connected to a value (number). When making connections, incompatible attributes will be dimmed in the Attribute Editor or hidden in the Scene Window.