Layouts
Intro
Layouts provide a way to stack Shapes by 'butting' them up against each other. This means that if the bounding box of one Shape in the stack changes, the others will move to accommodate the new space required for that Shape.
This is useful for creating dynamic layouts which need to respond to changes in size as well as being a fun, artistic feature.
Creating a Layout
Layouts can be created by simply adding Shapes to one of the Layout Group types:
- Layout Group - Arrange Shapes in either a horizontal or vertical direction with options to wrap onto multiple rows/columns.
- Grid Layout Group - Arrange Grid Layout Rows into columns.
- Grid Layout Row - Arrange Shapes in rows for use in a Grid Layout Group.
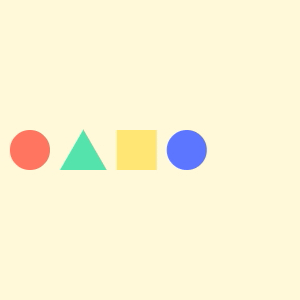
- Create 3 Shapes.
- With all 3 Shapes selected, right click in the Viewport and choose Layout > Embed selected in Horizontal Layout.
To create a simple horizontal layout:
- Create 2 Shapes.
- Create a Layout Group.
- Select both Shapes in the Scene Window.
- Click and drag both Shapes onto the Layout Group.
- Release the mouse.
Both Shapes will be laid out side by side in a horizontal Layout. If the Width (Size W) of either Shape is changed, the layout will update accordingly.
Layout Groups can be created via the Add Layers window like any other Layer but they can also be created using the contextual menus in the Scene Window or Viewport. Just select several Shapes, right click and choose Layout > Embed selected in [Horizontal/Vertical/Grid] Layout.
To remove a Shape from a Layout Group simply drag it out of the Layout Group.
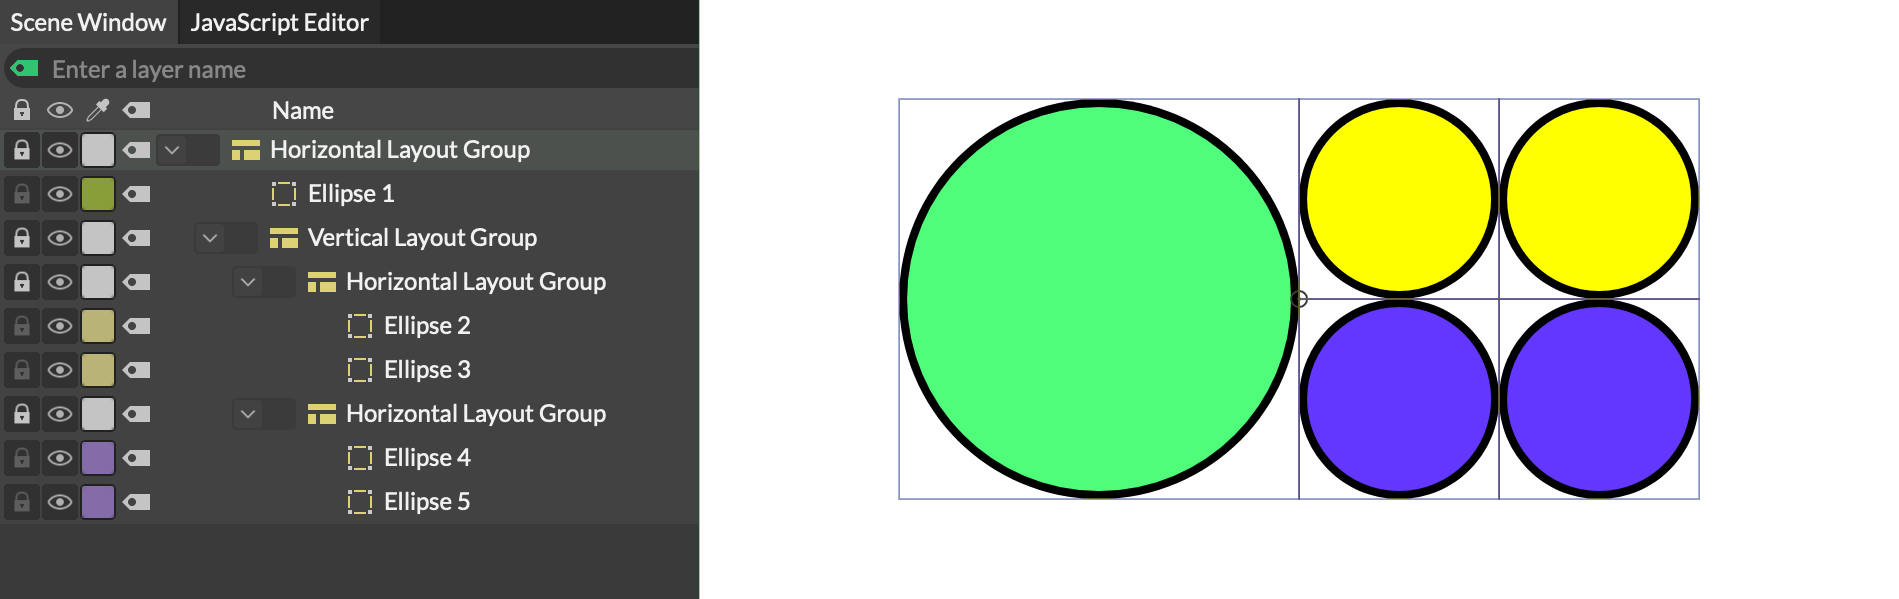
Hierarchy
Layout Groups are hierarchies with Shapes organised from top to bottom of the layer stack. Any child of a Layout Group will be included for placement but Shapes deeper than a child (e.g. grandchildren etc.) are ignored.
More complex layouts can be created by nesting Layout Groups within other Layout Groups.
In the example below, 2 horizontal Layout Groups are the children of a vertical Layout Group which itself is the child of another horizontal Layout Group.
A Shape within a Layout Group can be excluded from from the layout by checking Exclude from Layout under its Advanced tab in the Attribute Editor. See Common Attributes.
Transforms
Once a Shape is added to a Layout Group its transforms (position/rotation/scale) can be adjusted meaning that it's possible to animate Shapes within a Layout Group. Note that the layout reads the Bounding Box of a Shape and ignores 'top-level' transforms. So while a Shape may be rotated, the layout itself will not change as the Shape's bounding box has not changed.
When a Shape is added to a Layout Group, its Position will be reset to 0,0. While Shapes do not have to be at 0,0, layouts can start to look broken if Shapes are unintentionally moved.
A Shape's transform will be maintained when removing it from a Layout Group.
Bounding Box
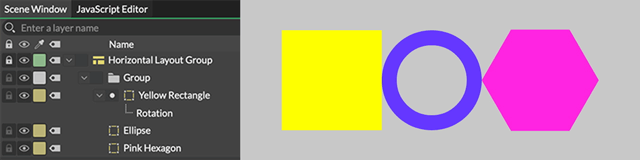
A Shape's world space bounding box is used to calculate the space it occupies within the layout. Because the top-level transforms are ignored, it's necessary for a Shape to be a child of another Shape in order for any transformations to affect the layout's bounding box calculation.
In the example below, because the yellow rectangle is the child of a Group (bottom), its rotation changes the bounding box of the Group which, in turn, affects the layout of the other Shapes within the Layout Group.
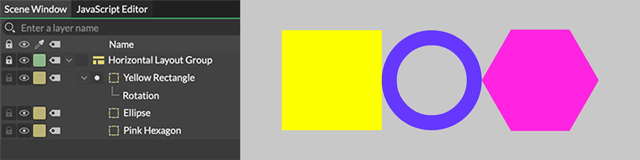
Although Shapes below children (e.g. grandchildren etc) are ignored by the layout itself, as part of a hierarchy they are included in the bounding box calculation of their parent which can then affect the layout.
Spacers
Spacers can be used to fill any available space within layouts and so used to evenly space or align cells to the left/right/top/bottom of layouts.
In the examples below, note how the Spacer fills the available space within the layout which then forces the other cells to align themselves accordingly.
To add a Spacer to a layout simply create one via the Add Layers window and drag it into a Layout Group.
A Layout Group's Spacing Mode must be set to Manual Spacers for Spacers to be included in the layout calculation. In any other Spacing Mode they are ignored unless they are set to 'Fixed Size'.
Alignment
A Shape's alignment within a cell can be set via the Vertical/Horizontal Layout Alignment options under its Advanced tab. See Common Attributes (Advanced tab).
Note that a Text Shape's Alignment and Vertical Alignment will be overridden by these settings.
Notes
- A Text Shape with baseline alignment will be aligned to the bottom of its layout. This means that any descenders will sit outside of its 'cell'.
- A Layout Group shares the features of Groups so children will inherit any Transforms, Filters or Deformers added to it.
- When creating any of the Layout Group types, either via the Add Layers window or the contextual menu, they will be locked in the Scene Window. This is to prevent adding any unintentional transforms for the Shapes within the Group when interacting with other Shapes in the Viewport.