Time Editor
Intro
Adjust the Clips and animation curves for Layers.
UI
Clips
As the cursor hovers over the end of a clip it will highlight. Click + drag either end of a Shape's clip to adjust the frames that appear in the Viewport. A Shape will be visible when the playhead is over part of the clip. For Behaviours, the clip represents when it will be enabled.
The clip has no effect for Utilities, Filters or Shaders. These Layers will appear as a chevron clip. Utilities that draw in the Viewport like Falloffs and Nulls and the Sound Behaviour are the exception to this rule. They behave in the same way Shapes do.
Setting start/end points
It's possible to adjust the start/end points of multiple Layers at the same time by holding down Option/Alt as you hover over an end point. The ends of any Layers that share a common in/out point will highlight and will all move when click + dragging. This is also true where one Layer's in point is on the same frame as another's out point.
Click and drag the bar between the in and out points to move the entire Clip.

Hotkeys
| Shortcut | Description |
|---|---|
| [ | Move the selected Clip's in points to the current frame. |
| ] | Move the selected Clip's out points to the current frame. |
| Option/Alt + [ | Trim the selected Clip's in points to the current frame. |
| Option/Alt + ] | Trim the selected Clip's out points to the current frame. |
Split/Merge Clips
Further options for supported Clips can be accessed by right clicking on a Layer and choosing Clips > ... :
- Split Clip - Split a Clip at the current frame. This splits the clip into two meaning a Layer can be turned on/off in the Viewport several times.
- Merge Clip - Where Clips have been split, combine the Clips back into a single Clip.
- Add Clip to Start - If the start of a Clip is set after frame 0, add a section that starts at frame 0 and ends at the start of the existing clip.
- Add Clip to End - If the end of a Clip is set before the last frame, add a section that starts at the at the end of the existing clip and ends at the last frame of the Composition.
Show Names
Right click anywhere in the Time Editor and select an option under the Show Names item to display the name of an Layer on its Clip.
- None - Do not show the layer names.
- Left - Show the layer names aligned to the left hand edge of Clips.
- Right - Show the layer names aligned to the right hand edge of Clips.
Keyframes
Creating Keyframes
Once you have set a Keyframe via the Attribute Editor you are able to set further Keyframes in the Time Editor. To do so, either:
- Move the playhead and scrub the Attribute's value.
- Move the playhead and click the Keyframe icon in the Attribute control.
- Select a Keyframe or Keybar and then right click > Add Keyframe.
Editing Keyframes
To edit a Keyframe you can either:
- Move the playhead to the same frame as an existing Keyframe and scrub or edit the attribute's value.
- Double click a Keyframe and scrub or edit the attribute's value via the pop up control. Holding Option/Alt when double clicking will also move the playhead to that Keyframe.
Moving Keyframes
To move a Keyframe simply click and drag.
To move a selection of Keyframes either Cmd/Ctrl + click or marquee select multiple Keyframes and drag to move. You can also select and move Keyframes from multiple attributes and/or Layers.
Deleting Keyframes
To remove a Keyframe or Keyframes either:
- Select a Keyframe or Keyframes and hit the Delete key.
- Select a Keyframe or Keyframes and right click > Delete Keyframe(s).
Copying Keyframes
To copy a Keyframe, select one and choose Edit > Copy Keyframe (Cmd/Ctrl + C) then move the playhead and chose Edit > Paste (Cmd/Ctrl + V). You can do the same with multiple Keyframes on the same attribute.
You can also copy keyframe data from one Layer to another. If the keyframe data you are copying is from an attribute that already exists on the Layer you are pasting to, then those keys will be added to that attribute. If the attribute does not exist, it will be added along with the keyframe data.
Duplicating Keyframes
To duplicate Keyframes, select them and then Option/Alt + click + drag one of the selection. Copies of the Keyframes will be created on mouse release. This action can be performed across multiple attributes.
Coloring Keyframes
To change the color of a Keyframe select a Keyframe or Keyframes and right click > Set Color > choose your color. This can be useful for highlighting key moments in your animation.
Copying easing
Copying the easing of Keyframes to other Keyframes can be achieved via the right click menu.
- Select a Keyframe or Keyframes on the same attribute.
- Right click and choose > Copy Easing.
- Select some different Keyframes.
- Paste (Cmd/Ctrl + V)
Where a selection does not match – for example, copying 3 Keyframes and pasting them onto 2 Keyframes – Cavalry will copy Keyframe1 to Keyframe1, Keyframe2 to Keyframe2 and ignore Keyframe3.
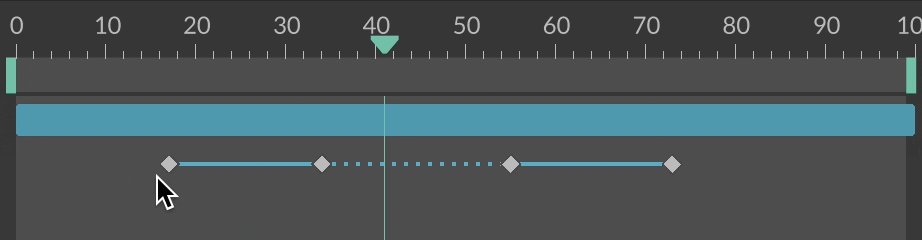
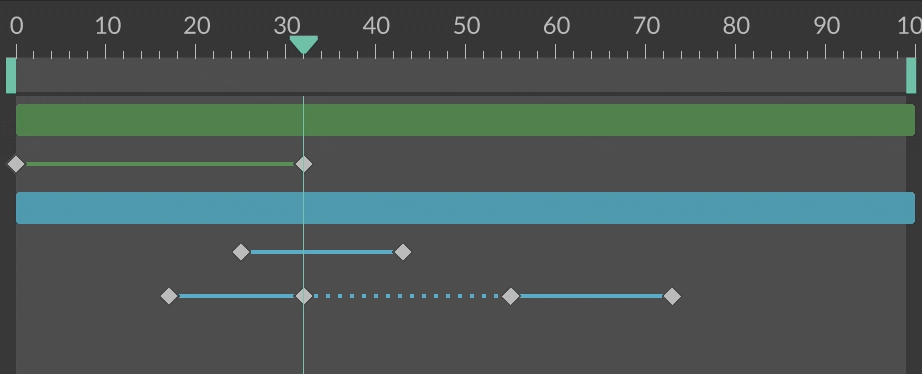
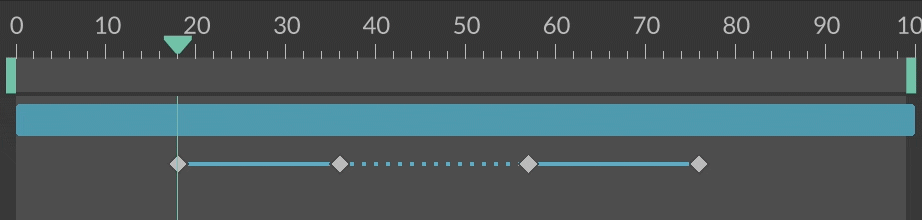
Keybars
Keybars are lines that connect Keyframe pairs and can be used to move entire animation curves without the need to select a range of Keyframes.
A Keybar appears as a solid line when between two Keyframes of different values. If a Keybar connects two keys of the same value it will appear as dashed line. This is designed to help identify areas where Layers remain static or unchanged.
Moving Keybars
To move an entire Keybar simply click and drag one.
Selection
When marquee selecting in the Time Editor the following selection logic applies.
- If a Keyframe exists within a selection, only select Keyframes.
- If no Keyframes exist within a selection, select the Keybars.
Hold Option/Alt when using marquee selection to filter out any Keyframes or Keybars to ensure only Clips are selected.
Tools
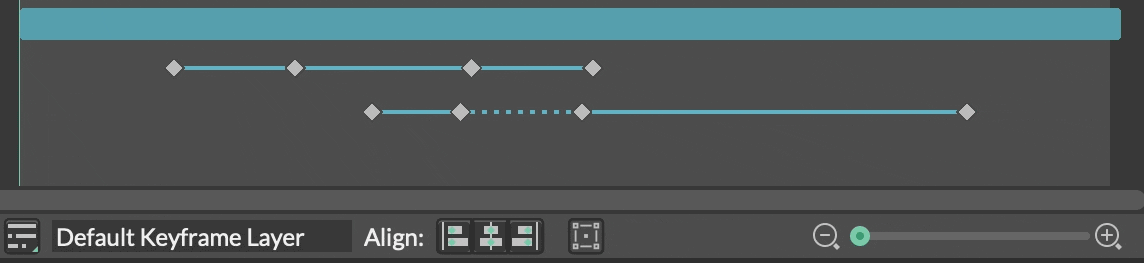
Keyframe Layers
Keyframe Layer - See Keyframe Layers.
Align
Align selected keys to each other. This works in the same way aligning shapes does. Imagine a rectangle bordering each 'group' of selected keys on each attribute and then aligning those rectangles to each other.
- Left - Align keys to the key nearest to the beginning (left) of your timeline.
- Centre - Centrally align keys.
- Right - Align keys to the key nearest to the end (right) of your timeline.
Transform tool
The Transform tool can be used to move and scale selections of keys. With the tool active, a green area will appear around any selected Keyframes. Click + drag the middle of the green area to move the selection or click + drag either end of the green area to scale the Keyframes.
Snapping Settings
Snap Keyframes and Clip ends to other Keyframes, Clips and Time Markers.
Options:
- Enable Snapping - Enable/disable snapping.
- Snapping Threshold - Set the distance (in screen pixels) within which snapping will happen.
- Keyframes - Enable/ disable snapping to Keyframes.
- Clips - Enable/ disable snapping to the ends of Clips.
- Time Markers - Enable/ disable snapping to Time Markers.
Position the playhead at the next Keyframe by using the Option/Alt + Cmd/Ctrl + ⬅︎/⮕ arrow hotkeys. Keyframes can also be filtered by selecting Layers, Attributes or selections of Keyframes. For example, if the position.x Attribute is selected, Keyframes on other attributes will be ignored.
Pacing Markers
Add guides to the Time Editor to indicate seconds or audio beats. Toggle the button to enable/disable them or use the arrow to open a disclosure window containing the following options:
Mode - Select a mode:
- Seconds - Add Pace Markers on each second.
- Beats per Minute - Add Pace Markers based on a BPM.
Divisions - When Mode is set to Seconds, determine how many sub-steps to add between seconds.
Beats per Minute - When Mode is set to Beats per Minute, set the BPM for the audio track. Grey guides represent Beats with the blue guides marking the Bars.
Offset - When Mode is set to Beats per Minute, move the markers forward or backward in time.
Beats per Bar - When Mode is set to Beats per Minute, set the number of beats in each bar.
Zoom
Drag the slider to zoom in/out of the window or click the magnifying glass icons at either end of the slider. Alternatively, use the following keyboard shortcuts:
| Hotkey | Command | Mouse | Trackpad | Tablet |
|---|---|---|---|---|
| Option/Alt + scroll | Zoom. | ✓ | ✓ | |
| Shift + scroll` | Pan left/right. | ✓ | ✓ | |
| Pinch | Zoom. | ✓ | ||
| Option/Alt + double click + drag | Zoom. | ✓ | ||
| F | Set the zoom to fit the Playback Range | ✓ | ✓ | ✓ |
| Shift + F | Set zoom to fit the Frame Range | ✓ | ✓ | ✓ |
Magic Easing
Apply mathematical interpolation between Keyframes.
- Select one or more Keyframes.
- Right click > Magic Easing.
- Choose an option.
It's possible to add custom expressions for Magic Easing by choosing Edit Custom Expression... from the options. Some examples:
1 - pow(1 - x, 5)
x * x * x * x * x
-(cos(PI * x) - 1) / 2
var c1 := 1.70158;
var c2 := c1 * 1.525;

x < 0.5
  ? (pow(2 * x, 2) * ((c2 + 1) * 2 * x - c2)) / 2
  : (pow(2 * x - 2, 2) * ((c2 + 1) * (x * 2 - 2) + c2) + 2) / 2;
You can bake the animation to Keyframes using the Bake Keyframe Animation command in the Animation menu.